Managing Files in a Review
In Settings > Review, you can adjust general Review settings. This will apply to the default settings for any new Reviews created after the settings are adjusted, but will not affect existing Reviews.
Once you've selected your settings, the following are your options for creating and adding files to your Review.
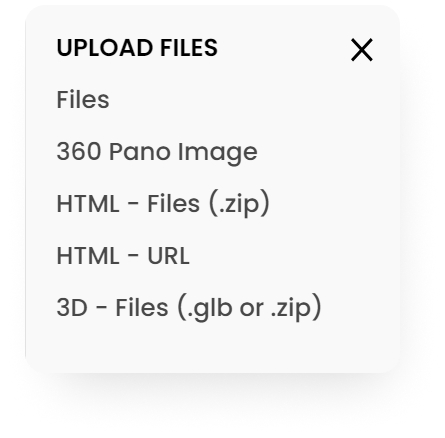
To add media content to the Review, click on the Upload Files button.

Select the type of content that you want to upload (note that HTML, 3D Files, and Pano Images have special designations but all other content formats can be uploaded as Files).

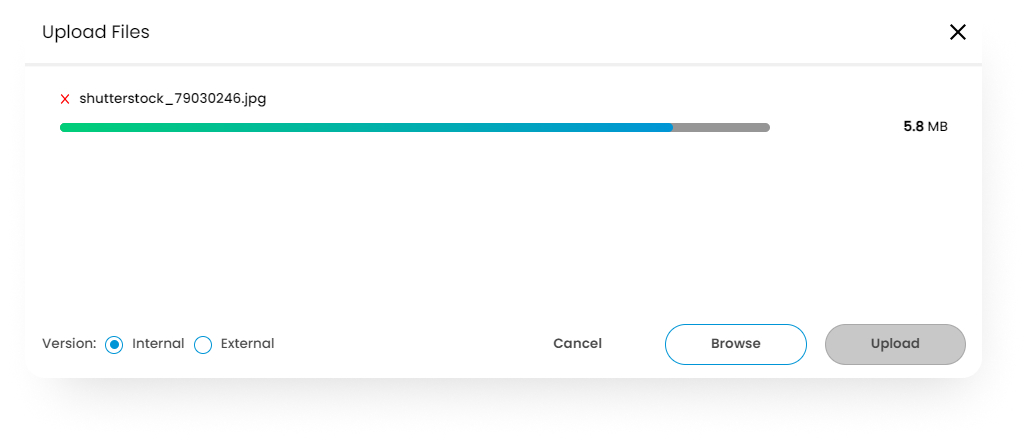
You may then drag and drop the files from your OS file browser or click to select the files that you wish to upload. The files will be displayed in the Upload menu. Once you have all the files you want displayed, click the Upload button to initiate the uploading.

As the files upload they will show as a list in the Review edit menu. It may take a few seconds for the thumbnails to show as the files are being prepared (up to a few minutes for encoding videos or large PDF documents). Once the thumbnail shows, the Review is ready to review and share.
Ordering Your Files
The order you see the files is the order the files will display in the Review Canvas. You can sort the files by using the sort dropdown menu at the top of the list.
With the default manual sort option, you can drag and drop the file cards into the specific order you want the files presented in the Review Canvas by selecting the up and down arrows on the left of the file card.

File Actions
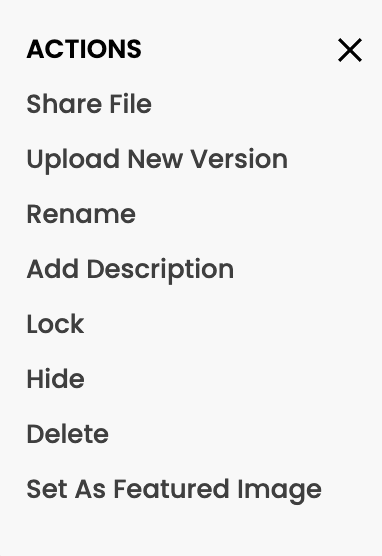
From the action menu at the right of each file card, there are a number of operations you can perform on the file. You can also perform these operations on multiple files at the same time by first selecting them and using the “Batch Actions” menu at the top of the file table. The available actions include:

Upload New Versions
As your project progresses you may also upload sequential versions of each file to organize and track its revision history. File Versioning
File Descriptions
The description allows everyone involved in the Review to quickly see a description of the file. File descriptions can be used to provide background information about the file, specific instructions you may want to communicate or supplemental copy (i.e. social media posts) that may relate to the visual media being displayed.
Files that have descriptions applied to them will display an icon to the left of the file name, and clicking on the icon is also a shortcut to viewing or editing the description.
To add a file description, choose “Add Description” from the file action menu. The description can then be edited at any time by choosing “Edit Description”.
Rename, Lock, Hide, or Delete a File
Rename, Lock, Hide, or Delete a file by selecting the option from the file action menu to the right of the file card. Hiding files will hide them from the thumbnail strip on the Canvas so they are no longer visible or accessible to reviewers. Locking a file will maintain its visibility but prevent the addition of annotations or comments.
Convert to External Version
If Privacy Options are being used, you can convert an “Internal” version (not visible to external reviewers) to an “External” version so that it would become visible to all reviewers. (See Internal - External Privacy Workflows for more information)
Set Image as Featured
Set the thumbnail you want to have featured on the main dashboard and any review notifications by selecting Set Featured Image.
Once the Review options are set and files uploaded and sorted, you can share and notify the Review with your team and guests. See the article Review Sharing for full details.
Set the Status of a Review
From the main Dashboard, you may also set the Status of a Review. The status options provide the ability to set a Review as Inactive or Locked.

Setting a Review as Inactive can be useful, for example, when you set up a Review presentation meeting and want to distribute in advance the Review link in a meeting invite. Prior to sending out the notification you can deactivate the Review to prevent the participants from being able to access it and then reactivate it when the meeting begins.
Locking a Review
Locking a Review will allow the users to still see the content and all comments but will not allow them to make any further annotations. This option can be useful, for example, when you upload a new version of a file. You may want to prevent the user from adding more notes to the prior version of the file while still allowing them to see the previous version/notes for reference.
Note that in addition to locking an entire Review, you can also lock specific files within the Review by selecting the "Lock" option from the file action menu.
