
If you’ve received a link, whether through a system email, tagged, or even emailed directly, the first place you’ll land is on the Review Canvas.
Trouble accessing the Review as a Guest? See Quickstart Guide for Guests: Getting Started with the ReviewStudio Essentials for step-by-step logging into ReviewStudio.
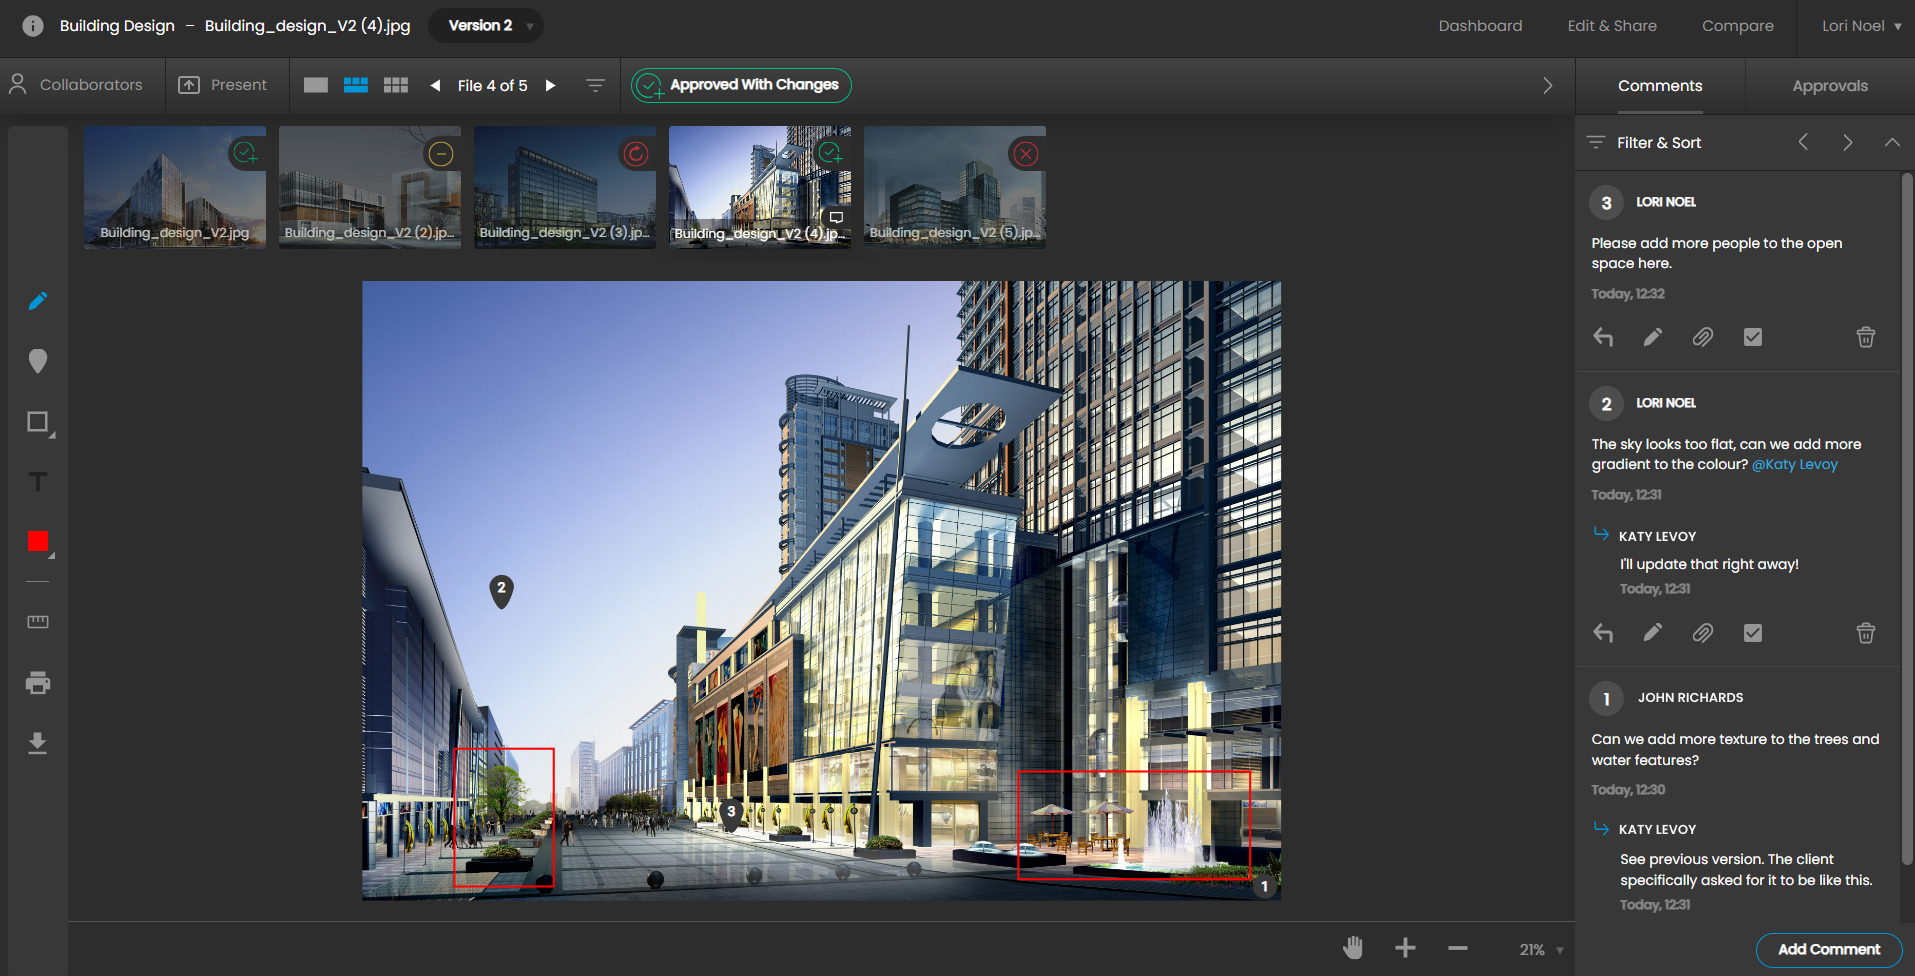
Review Annotations, Comments, and Approvals, all in the Review Canvas. Reviewers may make their annotations individually - on their own time - or you may also hold live real-time review sessions (see Present Mode).
To Annotate a Review
Select the desired annotation tool from the toolbar on the left side of the canvas. By default the pencil tool is selected allowing you to draw a free-form line.
Markup Tools
The Markup tools available are:
-
Pencil tool: For freehand drawing
-
Note tool: Leaves a “Pin” on the content for a comment tied to a location.
-
Shape tools: Includes Arrow, Double Arrow, Line, Box, Filled Box, Circle, Filled Circle. You can also use the “Draw More” button in the comment box to combine multiple shapes.
-
Text: If you’ve uploaded a document with text, the Text Tool will be enabled (see: PDF and Document Markup). You can select from options including Strikethrough, Underline, Replace and Insert. Select text in the document and the tools will appear at the top of the comment box. You can also “Paste Selection” to paste selected text.
-
Query tools: Query tools provide information on the measurements (ruler), text font, colors, and bar codes. More on Query tools: Reviewing Document Formats and PDF Content
-
Laser: In Present Mode, the Laser Pointer will be enabled.
Click on the red color square to change the color, size, and opacity of the mark you want to make. The size is specified in pixels relative to the resolution of the underlying image.
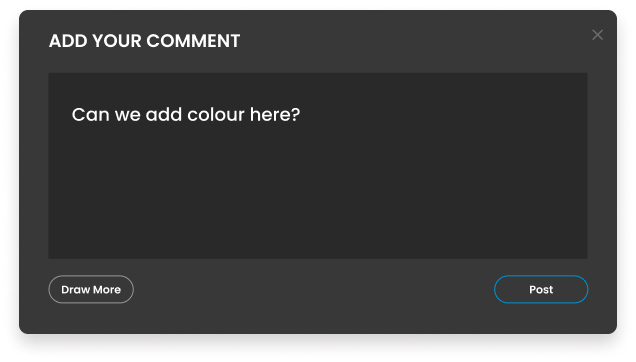
You may select “Add Comment” at the bottom of the comment bar if you want to add a general note that is not associated with any drawn mark.
The Comment Window
After you make a markup, a number, either in a pin or circle, is created (this may be moved if desired) and a comment window will pop up allowing you to leave a comment to be associated with the mark.
You also have the option to click “Draw More” if you wish to associate additional drawing elements with the comment. This will move and open the comment menu in the comment sidebar and you may continue drawing additional elements as long as it remains open (using any of the Pencil or Shape tools).
If you make an error as you draw new elements you can use the delete or backspace key to sequentially delete them. When you’ve completed adding all the elements and text you want in the comment, click “Post” to save and start a new comment.
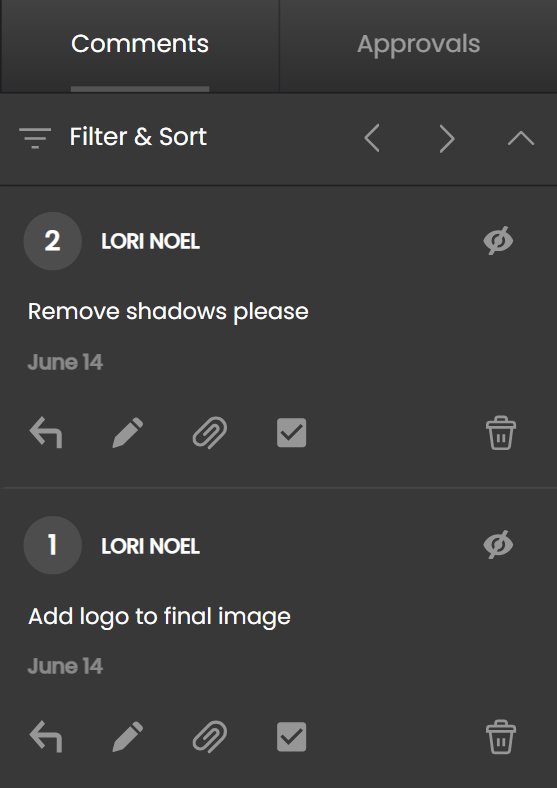
The Comment Bar
After saving the comment it will appear in the right comment bar along with your name, the comment number, and a timestamp. You may see you have a time limit during which you may edit or delete a comment you make. This time limit may be configured by an Admin user.
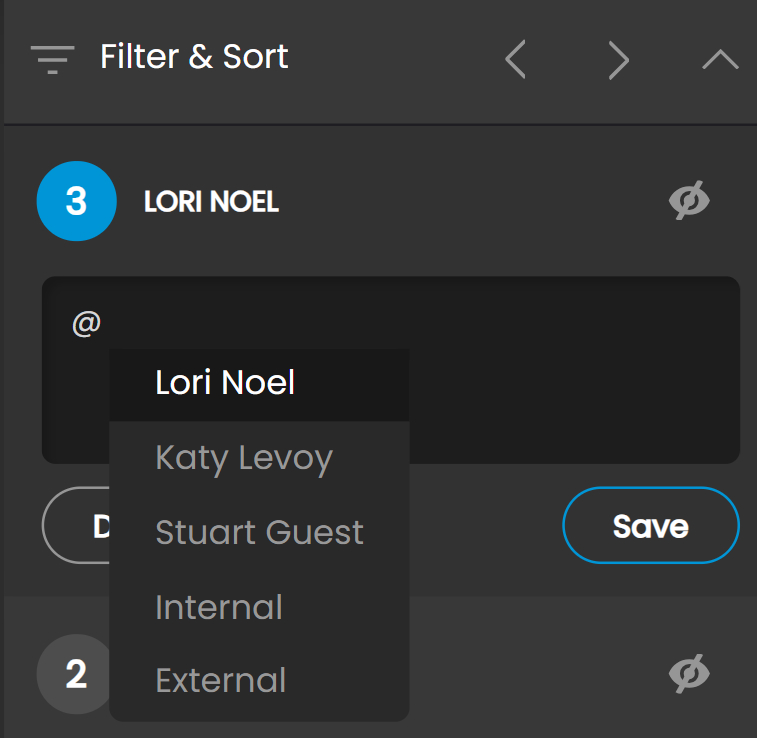
@Mention Users
To send an immediate notification to a Review participant, you can use the @mention functionality. When entering the text of a comment type "@" to activate a list of all the current participants and then choose the person you want to notify. That person will receive an immediate email with the comment text and a link directly back to the comment for review and reply.
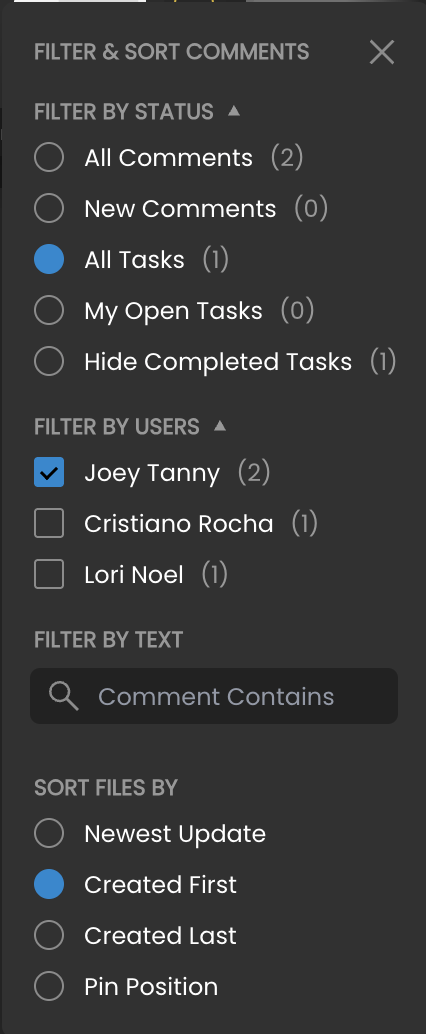
Navigating, Filtering & Sorting Comments
There are a number of ways to review and filter the comments made by yourself and other reviewers. You can click on the up/down arrow at the top of the comment bar to collapse a long list of comments and then use the left/right arrows or click on the name of a particular comment to open it.

If you are reviewing a video or multi-page PDF file, then clicking on the comment will take you to the frame or page on which it appears. You can also click the comment arrows in the player control to advance to the next/previous frame or page that has comments on it.
A red marker will be shown on any “New” comments (added after the last time you visited that particular review) so you can easily identify the ones you have not yet seen.
You may filter the list of comments by creator or by “new comments” only. For videos, you may also filter comments related only to the current frame you're viewing.
It is also possible to filter Open Tasks by User by choosing the Tasks filter, followed by the User’s name.
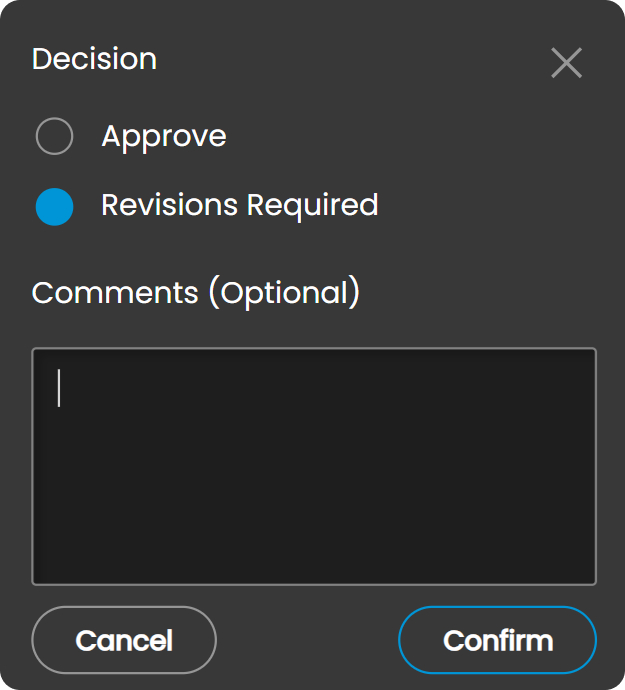
Submitting a Decision
If requested by the Review creator, you may also see the option to “Submit Decision”. Your options will have been configured by an Admin, and will be “Approve”, “Revisions Required”, “Approve with Changes” and/or “Rejected”.
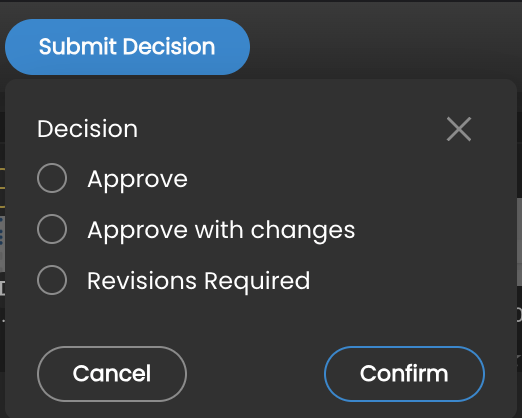
You may have the option to include a message with your decision.
Navigating the Files in a Review
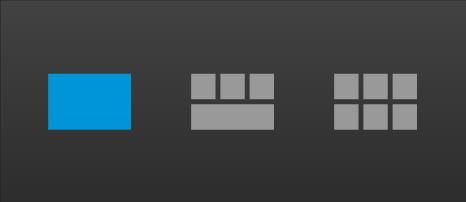
If there are multiple items in the Review, you will see a button at the top indicating the item number (ie. "3 of 14"). The Thumbnails Strip allows you to navigate between items in the Review. Click the arrows next to this button to advance to the next or previous item.
You will also see 3 options: hide thumbnails, show thumbnails, and batch view.
You also have options to sort and filter files from a range of options, such as ratings, approval status, tasks, and more.
Dark Mode / Light Mode
While dark mode is the preferred canvas backdrop for many doing video and photography review, light mode is often the preference of many in the marketing and print space. You can choose to work in either dark or light mode by selecting your preference from the dropdown in the top right corner next to your name in the Review Canvas.