
User accounts may be created for anyone (internal or external) who is involved in multiple Reviews on an ongoing basis.
Authenticated Users will have access to a Dashboard of all the Reviews they are involved in and can actively collaborate with Review tasks and notifications.
Note that individual Reviews can also be shared with “Guests” who can provide comments and approval actions (see Review Sharing). For our single-user plans this would be the only option available for sharing Reviews.
To Add a New User
-
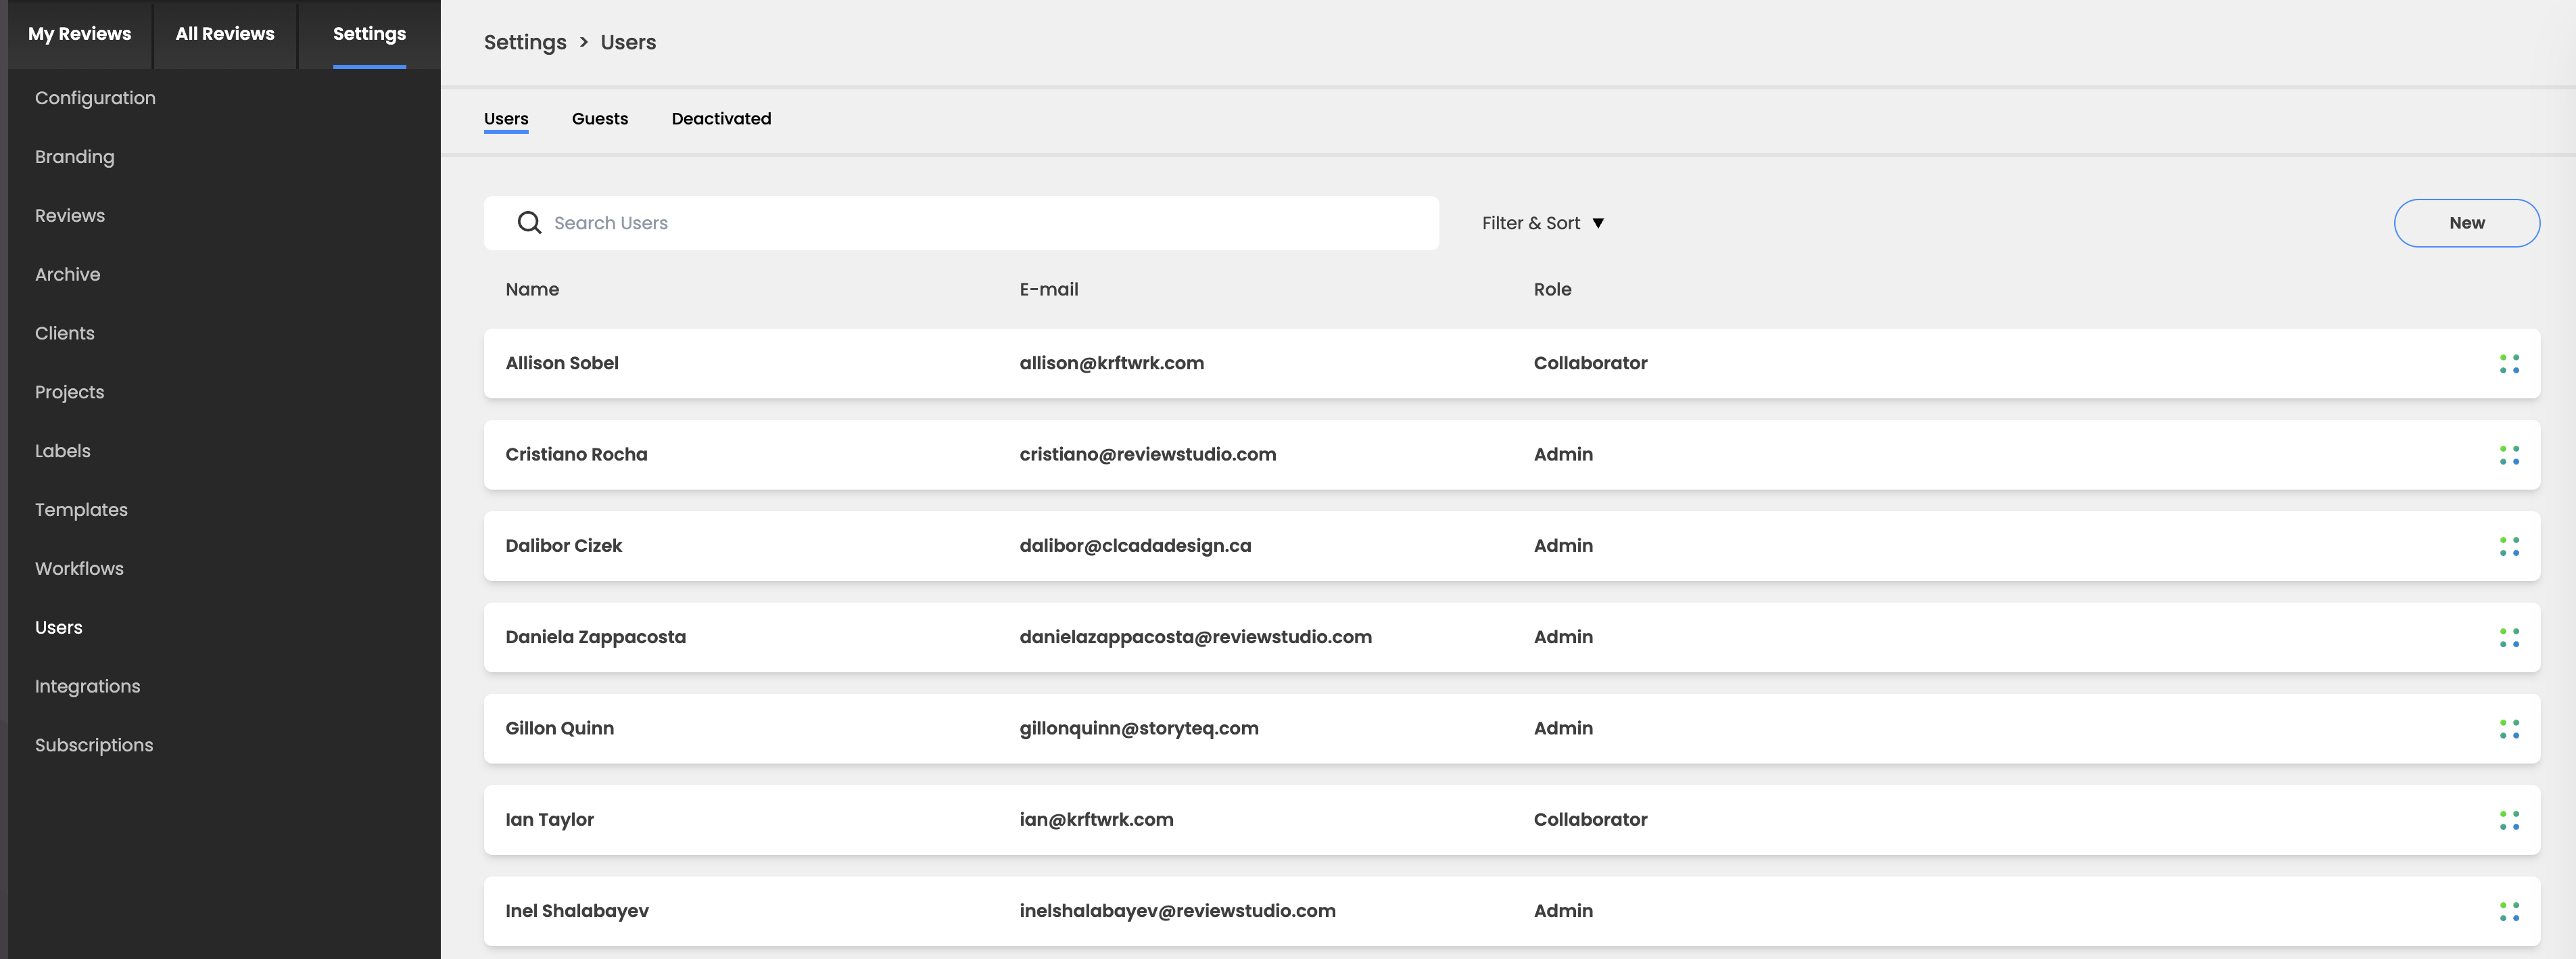
Go to Settings > Users tab. If you don't see the Settings then you don't have permission to create new users.
-
Click on "New".
-
Fill in all the information requested.
.jpg?cb=28bebfa273a16fdfbde4d27578a652df)
-
Select a role for the user:
Admin - These users are generally within your organization. The users will have full access to the system including the ability to see all the Reviews created by all other users and the ability to add or delete users. They can also manage general account-wide settings.
Manager - This role has the same ability as Admins to access all Reviews and Projects but without access to certain high-level account settings (Configuration, Branding, Review Settings, User Management, Billing).
Collaborators - These may include staff within your organization or external consultants you work with. These users have the ability to initiate new Projects and Reviews but they will only be able to see and access the Reviews that they create or that are shared with them by others.
Reviewers - These would include people within or external to your organization such as your clients. They do not have the ability to create new Reviews and will only see the collection of Reviews that are shared with them.
-
Click Invite to send an invitation to the user to join your account. Upon accepting the invitation, they will be asked to set a password and then redirected to the login page.
To preserve secure authentication only an Admin can change the name and email of any existing user.
Email Validation of New Users
We require any new user or guest invited to participate in your account activity first validate their email address to gain access to a dashboard or Review. When an admin creates a new user, they must first have that user accept an invitation before the user can be added to a Review or be sent any system emails. The invitation also offers new users the opportunity to set their own passwords when they accept the invitation. In addition, the first time a guest accesses a Review through a shared link, they will be required to enter a code sent to the email address they provide before they can gain access.
To Edit an Existing User
-
Click Settings > Users. If you don't see this you don't have permission to edit user settings.
-
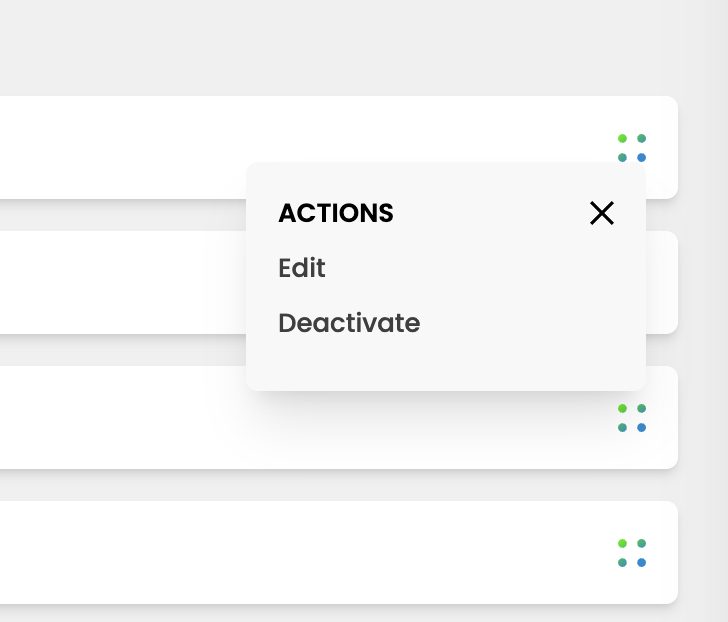
In the user list select Edit from the action menu.
-
Update any information desired and click Save. Note that changing a name will update that name on any existing activity for that user.
To Deactivate A User
-
Click Settings > Users. If you don't see this, you don't have permission to edit user settings.
-
In the user list select Deactivate from the action menu
-
Click Deactivate and confirm.
To reactivate a user go to the Deactivate user tab at the top of the page and select "Reactivate" from the action menu.
To Reset the Password of a User
-
Click Settings > Users. If you don't see this you don't have permission to edit user settings.
-
In the user list select "Reset Password" from the action menu. This will send an email to the user with a link for them to reset their password.
Add, Edit or Deactivate a Guest User
Click on the Guest tab at the top of the page to add and manage guest users. The process is exactly the same as described above for adding regular users with the exception that you will not be setting a role when you invite the guest.