
HTML content covers a wide range of applications – from simple, static content such as emails and web banners to more complex web pages containing interactive elements, animations, and transitions. ReviewStudio offers a robust solution with options that support the review and annotation of all types of HTML content, regardless of their complexity.
The options to consider fall into two categories – how you upload the content you want to review and how you annotate the content that’s been uploaded. You may have to test and experiment with the type of HTML content you develop to determine the most appropriate options to use for your situation.
Uploading HTML Content
ReviewStudio offers 2 ways to upload HTML content:
-
Upload an HTML file or a .zip file containing the HTML file and all the associated resources that would be required by the page.
-
Provide the URL of any publicly accessible web page. With this approach, there are 3 Display Options to choose from:
-
HTML Capture: Capture and upload all the HTML code from that page. Note that this approach may not always work if the page contains JavaScript elements that fetch or access content from other external resources.
-
Image Capture: Capture the page as a static screenshot. As with the previous approach, this may not always produce an accurate result.
-
Live URL: Proxy and display the live page in the Review Canvas directly. This approach is generally the most accurate for capturing more complex interactive web pages.
-
Live URL Navigation Options:
When providing URLs for the Review, you can specify whether or not you would like to allow navigation throughout the entire website that can be accessed from the URL specified.
Note that navigation will still be restricted to the primary domain of the URL.
When using the full website option, any notes added will include the specific page the note was added to.
It is highly recommended that when using the live URL option, reviewers install the Chrome extension that allows screen captures for notes on any dynamic content within the page.
Annotating HTML Content
Once the HTML content has been properly uploaded, there are also two options available to support how this content can be annotated:
-
Direct Annotations – Reviewers can use the pencil, note, shape, and text tools to add annotations directly over the HTML content displayed in the Review Canvas. As with other content, the position of the annotations will be synchronized to their location on the page when the annotation is made.
-
Screenshot Annotations - Web pages may contain complex dynamic content such as videos, interactive elements and transitions that can change the size or state of the page depending on how the viewer interacts with it. For these types of pages, adding direct annotations may not always work, since the location of the annotation may change depending upon the state of the page when it’s added. To overcome this limitation, an option is available to always save a screenshot of the page with each annotation that’s added. This ensures that the annotation will always show the precise state and location that the reviewer intended. Saving the screenshot may be especially important when using the “live web page” upload option, because the live website may undergo continual updates during the development process that could shift the position of the content thereby misaligning any direct annotations that may have been added without the screenshot.
To Activate Screenshot Annotations
Use the Chrome browser and install a Chrome extension that is a technical requirement for enabling this functionality (available here). Reviewers who do not use Chrome or install the extension can still add direct annotations but keep in mind that if pages contain dynamic content, the results may not be as precise.
To Upload HTML Content as a .ZIP File
-
On the Review Edit page, click the “Upload Files" button and select the "HTML - Files (.zip)" option.
.jpg?cb=9d871cd196fc4d387dacbcb11ac0b685)
-
Upload a .zip file that contains all the page content. Note that a file called 'index.html' must be present in the root of the .zip file or the page will not load properly. If any absolute paths are specified in the code, the remote server must allow any server to fetch the content (using relative paths should work fine in all circumstances).
-
You can specify the resolution that you want the content to be displayed by including the resolution anywhere in the .zip file name. For example, banner-970x250.zip will display the content in an iFrame fixed to that resolution.
To Upload HTML Content by Providing a URL
-
On the Review Edit page, click the “Upload Files" button and select the "HTML - URL" option.
-
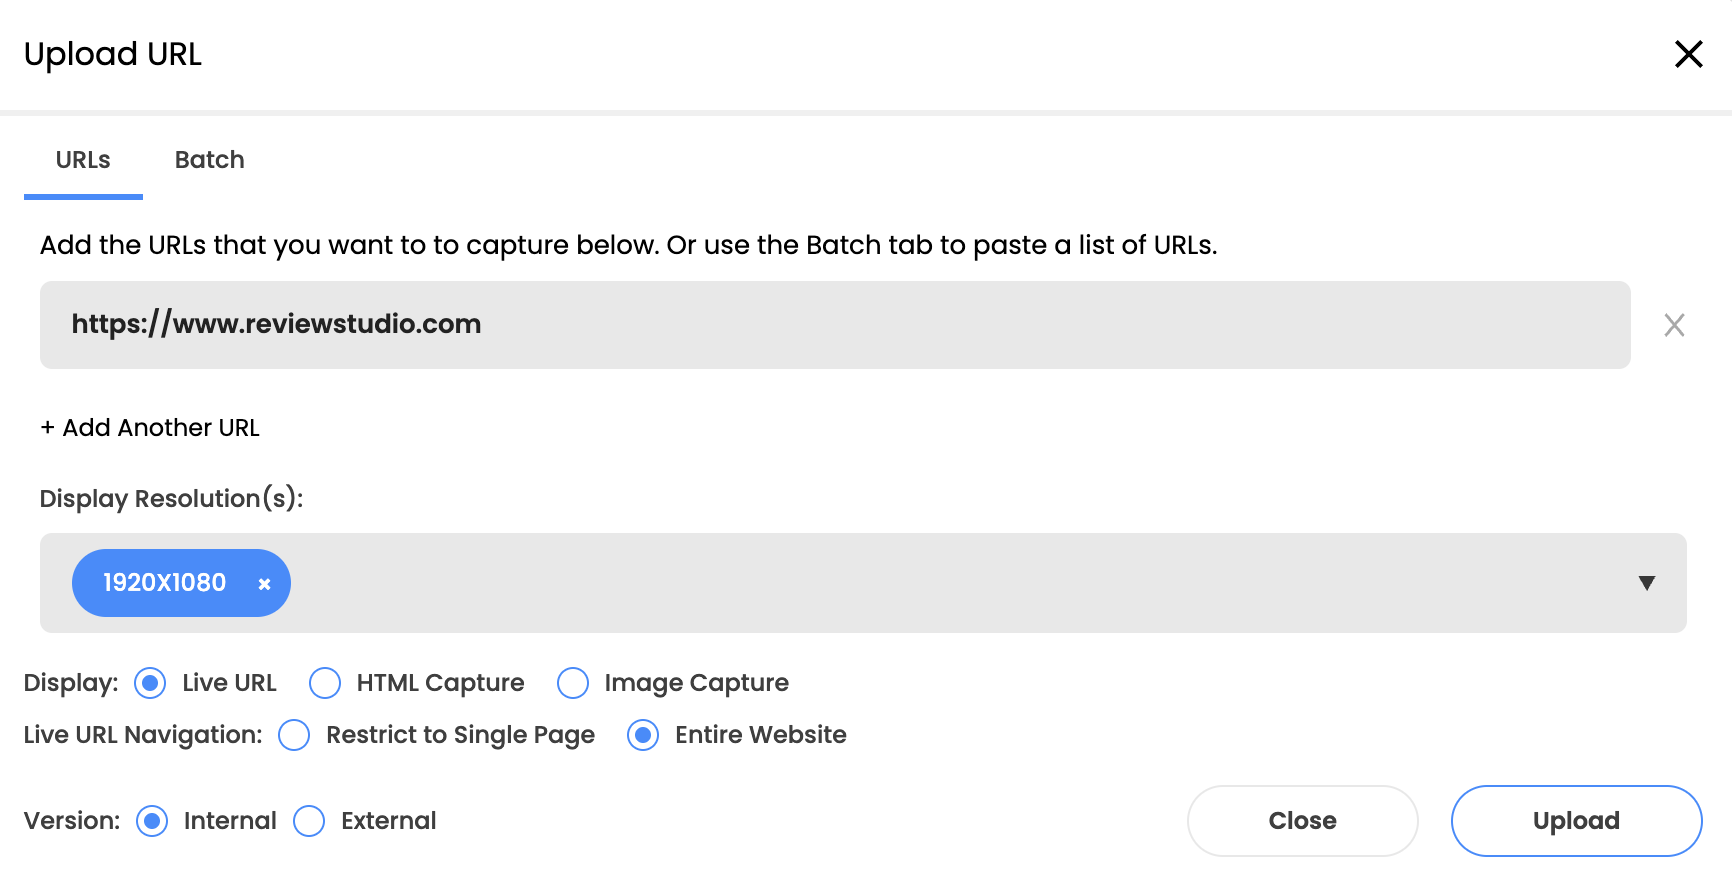
This will open a new menu that will let you enter the URLs of the pages you want to be imported to the Review.
-
Choose the URLs tab and enter one URL link per line. You can select +Add Another URL for each page you wish to add as an item in the Review.
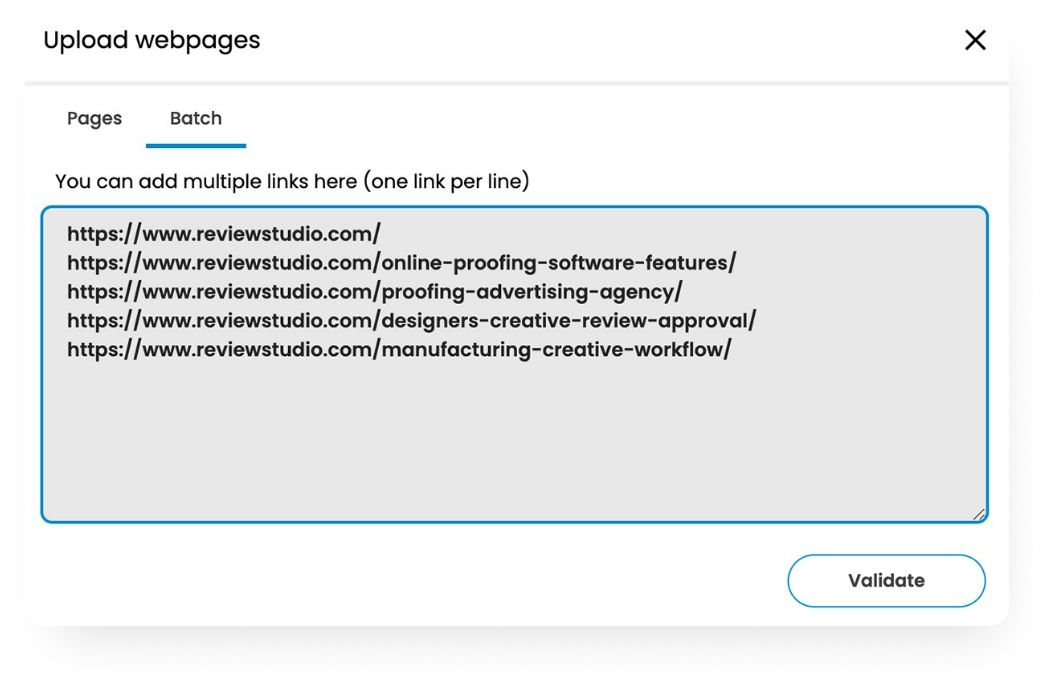
As an alternative, you can select the Batch tab to cut and paste a list of URLs from another source. Then Click Validate to verify the pages and add them to the Pages tab.
-
In the Display Resolutions menu, select the resolutions of the webpage as you want it presented in the Review Canvas. Note that each resolution selected will be presented as a separate file for review and approval.
-
Select how you would like to upload the link(s) to the Review:
-
Live URL – to show the live webpage. Keep in mind that any updates made a live page will be immediately reflected in the Review Canvas.
-
HTML Capture – to copy and upload the code of the webpage.
-
Image Capture – to capture a screenshot of the webpage and display it as a static image.
-
-
The URL display option allows you to specify whether you would like to allow navigation throughout the entire website that can be accessed from the URL specified.
Please note that your pages can take a few moments to be prepared. Once you see the thumbnail loaded in the Edit Review page, your content is ready for review.
Reviewing HTML Content
Within the Review Canvas, the HTML content will be displayed within an iFrame. At the bottom of the iFrame are two buttons to indicate if you want to “Interact” with the page (i.e. Scroll, play videos or carousels, click links) or “Annotate” the page (ie. Add lines, shapes, notes or text markups).
If the content exceeds the iFrame resolution, you may scroll the content using your mouse, touchpad or scrollbar of the iFrame. Note that selecting any annotation in the toolbar will automatically switch the mode to “Annotate” while scrolling with a mouse or trackpad will automatically switch the mode to “Interact”.
Annotations may be made directly on the content as they are with any other file type. For live web pages or pages that contain a lot of interactive elements, it is recommended that the Chrome browser be used together with the ReviewStudio Chrome Extension (available here). With the extension installed, a screenshot of the iFrame will be saved along with each annotation so that the exact state of the page when the annotation was added will be preserved. If you would like to present to all your reviewers the option of installing the extension from the Review canvas, you can activate the “Offer Chrome extension access in Review Canvas.” in your account settings > reviews menu (note that the extension link will only be offered to reviewers using Chrome).
To view the annotations, you have to click on each comment in the comment bar to display its associated annotation. You can also use the arrows at the top of the comment bar to cycle through and display each comment one at a time.